Don't miss our special offers - Contact Us Now!
How to Choose the Right Sheet Metal Clinching Tool for Your Application
How to choose a sheet metal clinching tool depends on several critical factors—including joint type, material thickness, geometry, and production volume. Selecting the right tool ensures not only the structural integrity of your components but also long-term process efficiency and reduced downtime.
At Jurado Tools, we specialize in advanced clinching machines designed to meet the specific needs of industrial manufacturers in HVAC, automotive, and appliance sectors. In this guide, we’ll walk you through the key considerations to help you choose the most suitable clinching tool for your application—whether manual, pneumatic, or custom-built.
What Is a Clinching Tool and What Does It Do?
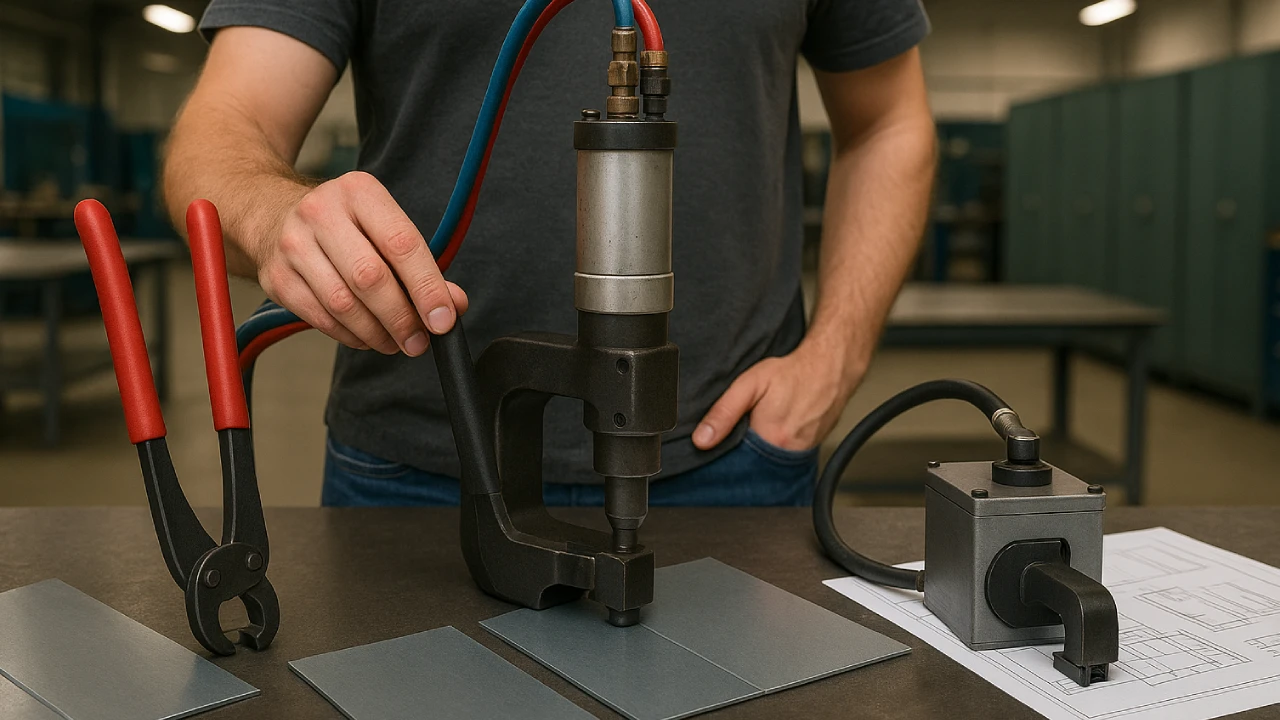
A clinching tool is a mechanical device used to join two or more layers of sheet metal through cold deformation, forming a strong interlocking joint—without welding, riveting, or adhesives.
The process involves pressing the layers together using a punch and die, which reshapes the material locally to create a permanent mechanical lock. This is often referred to as cold welding, as no heat, filler material, or surface treatment is required.
Clinching tools are commonly used in:
- HVAC systems (ducts, panels)
- Automotive manufacturing (door frames, supports)
- Appliance production (metal casings, enclosures)
- Electrical cabinets and sheet metal boxes
There are various joint types—most commonly round and trapezoidal—each offering different strengths and applications.
For a detailed technical overview of the clinching process, refer to this summary by TWI Global:
As we explore in the next sections, choosing the right clinching tool means understanding not only how it works, but how it fits your materials, geometry, and production goals.
Key Factors to Consider Before Choosing
Choosing the right sheet metal clinching tool is not just about brand or price—it’s about technical compatibility, long-term reliability, and integration into your production workflow.
Here are the most important factors to evaluate:
1. Sheet Material and Thickness
- Is the metal ductile enough for deformation (e.g. steel, aluminum)?
- What’s the total stack thickness to be joined?
- Thinner materials may require less force, but greater precision.
2. Required Joint Strength
- Will the joint handle static or dynamic loads?
- Does your application require shear resistance, peel strength, or both?
- The joint type and punch shape directly affect final performance.
3. Joint Geometry and Accessibility
- Are the sheets flat or folded (e.g. U-profiles, flanges)?
- Is there limited space or depth available for tool access?
- You may need tools with extended throat depth or 90° head configurations.
4. Production Volume and Speed
- Manual tools are best for low-volume or repair jobs.
- Pneumatic systems offer higher repeatability for mid- to high-volume lines.
- Consider your cycle time and operator fatigue.
5. Force and Power Requirements
- Some joints may require up to 35 kN or more.
- Does your facility support compressed air or hydraulic power?
- Built-in pressure boosters can increase force without external systems.
For a comparison between clinching and welding in these use cases, read:
🔗 Clinching vs Welding – Which Should You Use?
In the next section, we’ll compare manual, pneumatic, and hydraulic clinching systems, to help you determine which drive method fits your production needs.
Perfetto! Ecco la sezione “Manual, Pneumatic or Hydraulic? Pros and Cons”, con:
- Struttura comparativa chiara
- Terminologia coerente con il settore B2B
- Link esterno contestualizzato con anchor naturale verso l’articolo:
🔗 The Benefits of Pneumatic Tools
Manual, Pneumatic or Hydraulic? Pros and Cons
One of the most important decisions when selecting a clinching tool is choosing the right power system. Each type—manual, pneumatic, and hydraulic—offers distinct advantages depending on your application, production volume, and workspace conditions.
Here’s a breakdown of the most common options:
Tool Type Comparison
| Tool Type | Best For | Pros | Cons |
|---|---|---|---|
| Manual | Low-volume use, mobile applications | Lightweight, no power source required | Limited force, slower operation |
| Pneumatic | Medium-volume, repetitive operations | High consistency, low maintenance, fast cycles | Requires compressor, air setup |
| Hydraulic | High-force, automated or structural jobs | Extremely powerful, customizable for automation | Expensive, heavier, needs fluid management |
When to Use Manual Tools
- Great for small workshops, on-site repairs, or prototyping
- No need for air or electricity
- Less investment, but slower and more labor-intensive
When Pneumatic Tools Make Sense
Pneumatic clinching tools are ideal for daily production tasks that require speed, precision, and reliability. They offer the best power-to-weight ratio, require minimal maintenance, and are safe to operate.
Learn more about the benefits of pneumatic tools and how they support efficient cold-forming in industrial environments.
When to Choose Hydraulic Systems
Hydraulic clinching machines are often used in automated lines, or when maximum clamping force is needed—for example, when joining thicker stacks or structural parts. They offer performance but come at a higher cost and complexity.
In the next section, we’ll explore how tool geometry—like throat depth and head access—can affect what you can actually join, and how easily.
Perfetto, ecco la sezione “Understanding Tool Geometry: Throat Depth & Opening”, sviluppata in modo discorsivo, fluido e professionale, mantenendo il tono tecnico ma più narrativo, come richiesto:
Understanding Tool Geometry: Throat Depth & Opening
When selecting a clinching tool, one factor that’s often overlooked—but critically important—is the geometry of the machine itself, especially the throat depth and the opening of the C-frame.
The throat depth refers to how far the tool can reach from the edge of the sheet metal into the material. If your joints need to be placed several centimeters inward—such as in the center of a panel, a box section, or a large cover—you’ll need a tool with a sufficiently deep throat. Shallow throat tools are often lighter and more compact, but they limit your flexibility in terms of joint positioning.
Another essential aspect is the head opening system. In many real-world applications, sheets aren’t flat. They may be folded, curved, or have overlapping flanges. A traditional fixed-head tool might struggle to access those areas, whereas tools with a mechanical or assisted head opening—like Jurado’s Python LA or Mouse ALS—are specifically designed to work around these obstacles. These systems allow the operator to insert the tool over bent profiles or U-channels and then close it securely around the jointing point.
In essence, choosing the right tool geometry is not just about fitting the sheet metal under the punch—it’s about ensuring that your production process remains fluid, your operators work efficiently, and your quality remains consistent, regardless of shape or constraint.
Whether you’re dealing with HVAC ducts, appliance casings, or electrical cabinets, tool geometry can mean the difference between a smooth workflow and constant rework.
Choosing the Right Tooling: Dies and Punches
Selecting the correct dies and punches is just as important as choosing the machine itself. These components define the shape, strength, and quality of the clinching point, and must be matched to both your material and your performance expectations.
The two most common joint geometries are round and trapezoidal.
- Round joints are often used when aesthetics matter, like in appliance housings or visible enclosures.
- Trapezoidal joints provide superior mechanical strength and are preferred in automotive parts, structural HVAC components, or areas subject to vibration and mechanical stress.
The tooling also needs to match the type and thickness of the sheet metal. Using a punch and die combination not designed for your material stack could result in weak joints, incomplete deformation, or tool damage.
For more advanced needs, many tools support interchangeable punch and die kits, allowing manufacturers to switch between joint types or adjust for different stack heights. This level of flexibility is ideal in environments where different product variants are processed on the same line.
Here are the key parameters to consider when selecting tooling:
- Material type (steel, aluminum, stainless steel)
- Total sheet thickness
- Required joint geometry (round or trapezoidal)
- Tool life and wear resistance
Jurado Tools offers configurable tooling kits adapted to your machine type, with options for different heights, diameters, and materials—ensuring your clinching process remains both reliable and adaptable.
Perfetto. Ecco la sezione “Custom or Standard? When to Go Bespoke”, sviluppata in modo discorsivo e professionale, pensata per orientare il lettore tra soluzioni standard e personalizzate, mantenendo focus sul valore tecnico.
Custom or Standard? When to Go Bespoke
In many production environments, a standard clinching tool will perform perfectly well—especially when working with common sheet metal formats, standard geometries, and predictable volumes. However, as soon as your application involves non-standard materials, tight tolerances, or limited access areas, a custom-built solution often becomes the smarter, long-term investment.
Custom clinching tools are particularly valuable in use cases where the joint must be placed in hard-to-reach areas, such as deep folds, closed box sections, or complex profiles. For example, HVAC and automotive manufacturers often require tools with special throat geometries or 90-degree working heads to reach behind flanges or into U-shaped profiles.
Going bespoke also allows you to:
- Adapt force levels to your specific material and thickness combinations
- Integrate pressure boosters directly into the machine for space-saving, compact setups
- Customize tool opening systems to match irregular part geometries
- Automate specific cycles according to your line requirements
At Jurado Tools, we offer fully customizable solutions—including variations in C-frame size, hydraulic thrust, and modular tool kits—to help clients handle complex assemblies without compromising on speed or joint quality.
If your standard tool isn’t quite doing the job—or if you’re designing a new product with unique joining challenges—a custom clinching system is often the key to unlocking performance, efficiency, and repeatability.
Maintenance, Durability and Support
When investing in a clinching tool—standard or custom—long-term durability and serviceability should be part of your evaluation. In high-throughput production environments, even a few hours of downtime can create bottlenecks and delay deliveries. That’s why selecting a tool that’s both robust and easy to maintain is critical.
Pneumatic clinching tools, for example, tend to have fewer moving parts compared to hydraulic or electric systems. This results in lower maintenance frequency and fewer failure points. However, even the best-designed system requires occasional checks: punch and die wear, alignment, and air pressure regulation are all key to maintaining consistent joint quality.
Here’s what to look for in terms of durability and support:
- Tool body construction: A solid C-frame in treated steel offers longevity under high-force cycles.
- Wear parts availability: Punches, dies, seals—ensure replacements are standard and in stock.
- Ease of disassembly: Maintenance should be fast, even for non-specialist operators.
- Supplier support: Access to documentation, remote assistance, and spare kits is essential.
At Jurado Tools, we support all our clinching systems with technical documentation, remote diagnostics, and custom spare part packages to ensure continuity. Whether your system is used in a manual station or integrated into an automated line, our focus is on minimizing unplanned stops and extending tool life.
In many cases, the difference between a smooth-running operation and a disruptive one isn’t just the tool itself—but the quality of the support behind it.
Ask the Right Questions Before You Buy
Choosing the right clinching tool isn’t just about specs on a brochure—it’s about knowing how the system will perform in your specific process, with your materials, and under your production constraints.
Before making a purchase—or even requesting a quote—it’s essential to ask targeted, practical questions that go beyond general product descriptions. These questions will help you understand whether the tool is truly compatible with your application, and whether the supplier can support your long-term operational goals.
Here are a few essential questions to consider:
- What materials and thickness ranges can the tool handle?
Make sure the punch and die are suited to your stack combinations—especially if you work with coated or stainless steel. - Can it operate effectively over folded edges or inside narrow profiles?
Evaluate the throat depth and head design to avoid accessibility issues. - What’s the required air or hydraulic pressure to achieve optimal force?
Understanding system requirements avoids underperformance and pressure loss. - Is the tooling interchangeable for different joint types or stack heights?
Flexibility is key when you manage multiple product variants. - What kind of maintenance cycle is recommended? Are spare parts readily available?
Support and availability can dramatically reduce downtime.
Asking these questions early will prevent costly mistakes later—and position your production for efficiency, consistency, and scale.